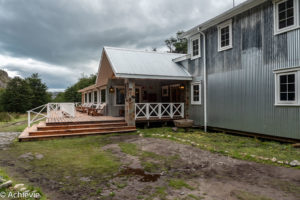
Puerto Natales town

The town of Puerto Natales is actually the base camp for the Torres del Paine trekking. Except for that, there's not much more going on there. The typical vistas of the town at sea are ok, but nothing exceptional. h6 Hotel We overnighted at Temauken hotel, which offers great...
Getting from Puerto Natales to Torres del Paine
Puerto Natales is the “gateway to Torres del Paine”. With a bus it takes you about 2 hours to get to Torres del Paine National Park. Make sure to book upfront, of course. We used Bus-sur, but there are a few other lines.
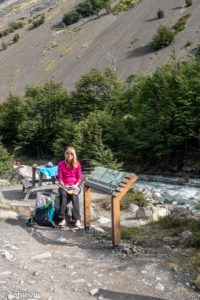
The bus makes 2 stops. The first one at Laguna Amarga, where you need to get your entrance ticket (and pay the corresonding fee). You can start the hike from this point as well. Or you can drive to the next stop – Pudeto – and take the boat to Paine Grande, to start the hike from there. The boat trip takes about 1/2 hour. There’s only limited capacity (we heard 80 people, although it looked like more people got on the boat), so just to make sure you get on there, get into the line on time. We went about 45min before the boat was scheduled to leave and were part of the first 30 or 40 passengers (rough estimate). Missing it can be quite a waste of time. Based on the boat’s schedule there’s only one at 11am (which we took) and then the next one is only leaving around 4.30pm.


Hiking routes and details
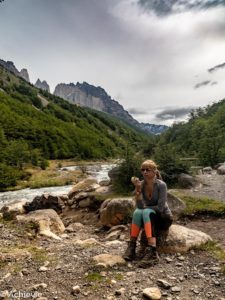
First of all, there’s actually 2 big routes to follow: the O-route and the W-route. After my husband did some investigation, the latter appeared to be the best one. And you can start it from both ends. We started from Paine Grande, ending up at the Torres del Paine base at the end (so from west to east). Apparently that’s the opposite way to do it, but also the most recommended one, as given the time of the day the number of visitors is lower. And – personally – and more importantly, you end your trek with a bang: the Torres del Paine base, which is just overwhelming. So, based upon that schedule I’ve set out the details from day to day:
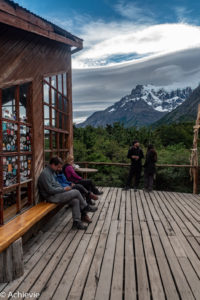
Day 1: From Paine Grande to Grey Lodge

This post describes day 1 of our 5-day trekking adventure in Las Torres National Park. To get to the main article describing the entire trip, take a look here. Day 1 of our adventure As we only had half a day left, after the travel from Puerto Natales, we kept it pretty...
Day 2: From Grey Lodge to Paso Ranger Station & back to Paine Grande

This post describes day 2 of our 5-day trekking adventure in Las Torres National Park. To get to the main article describing the entire trip, take a look here.Day 2 of our adventure This day was split up in two. Grey Lodge to Paso Ranger Station First half of the day was from...
Day 3: From Paine Grande to Britanico Lookout & back + to Los Cuernos

This post describes day 3 of our 5-day trekking adventure in Las Torres National Park
Day 4: From Los Cuernos to Las Torres Hotel to Chileno

This post describes day 4 of our 5-day trekking adventure in Las Torres National Park. To get to the main article describing the entire trip, take a look here.Day 4 of our adventure After the more strenuous hike of the day before and what was still to come the day after,...
Day 5: From Chileno to Las Torres base & back down to Las Torres Hotel

This post describes day 5 of our 5-day trekking adventure in Las Torres National Park. To get to the main article describing the entire trip, take a look here. Day 5 of our adventure Aaaah… here it is: the summum of the trip. Following the advice of some fellow...
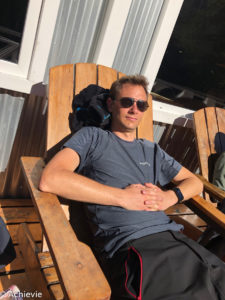
Accommodations and amenities
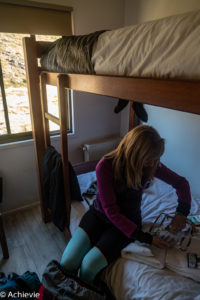
Lodges vs camping
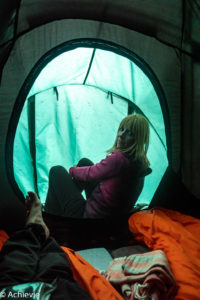
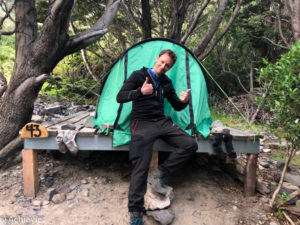
At the different en-route accommodations, you always have the option to choose for a room at the lodge or to camp in a tent. At Grey lodge we shared a room with bunk beds with 2 other people, at Paine Grande we had a room with bunk beds for ourselves and both at Los Cuernos and Chileno we spent the night in a tent.
Of course, our preferred option is a room for two, but that’s not always possible (these get sold out very quickly). I don’t like sharing the room – mostly because you just feel too limited in what you can do (I always worry about waking the others) and I usually don’t get a lot of sleep as I’m a very light sleeper.
The tent at Los Cuernos was great. Good mattress on the wooden floor, warm sleeping bag, no odeurs in the tent (important!). The one at Chileno was a lot less ideal: although we had two mattresses, they were so thin – wouldn’t make much difference if we just laid on the wooden floor. The tent was worn and torn as well and the smell wasn’t the best. Not the best night we spent here – luckily we already needed to get up at 4.30 to get to Las Torres base anyway, so that helped.
Bathrooms and showers
Probably silly from our end, but we didn’t bring any towels. As we had towels in the hostel in Borneo, we figured they would have it here as well. Not precisely. We asked at Grey Lodge, where they turned us down. At Paine Grande we rented one (7 USD per towel!). At Chileno it was included, but we needed to wait until the horses had brought them up.
I actually preferred the showers at Chileno (although the smallest site) to the one at Paine Grande. Immediately hot water and a handy tray to get your stuff in. There’s even shampoo and soap available from dispensers.
Toilets are as clean as they get at sites like these. And a lot depends on the hygiene factor of your predecessor… The drainage system just isn’t the same as at home, so it’s not always easy to get everything down the pipe, if you know what I mean. Sometimes it takes a little effort. Not everyone is willing to take an extra minute or two, apparently…
Make sure to not flush your paper into the toilet. They clearly indicate it on signs in the bathroom, so should be pretty clear, but just wanted to underline that.
Catering
When making your reservation, you’ll see that you can opt for a full package, including breakfast, lunch and dinner. I really recommend of taking that. The food is actually pretty good, comes in abundant portions and it’s just so much easier and practical than having to prepare (and carry!) your own food for 5 days (or more if you do the full trek).
Breakfast usually start rather late – at 7.30am. If you can’t make it (like we did on our last day, when we wanted to start early for the Las Torres base), we arranged with the reception of the camp site the evening before to get a breakfast package ready, before we left at 5am. You can still take a cup of coffee and even a hard boiled egg and muesli with yoghurt before you leave.
Lunch usually comes in a package (including a sizeable sandwich, energy bars, chocolate, an apple and a juice box). Only at Grey Lodge we were able to choose an inside lunch, which perfectly suited our planning of that day. We would have thought we got the same type of food, but no: spaghetti and even a desert was offered instead.
Dinner was always tasteful as well, including a soup, main course (typical Chilean) and a desert. Water (or at Paine Grande even juice) is free, anything else is payable. They do know their prices, that’s for sure. I think Los Cuernos topped it with 4.000 CLP for a soda. Many options, though, including cocktails (camping isn’t as primitive anymore, apparently).
Wildlife
When it comes to wildlife, I have to be honest: I was somewhat disappointed. Would have thought that we would see at least some guanacos during the hiking. Not the case – only when got back at Laguna Amarga, right before we cached the bus, a few guanacos were welcoming us back from our adventure.
We did see some prey birds and – we think – a condor. Twice we saw one of these birds with a mouse (or something similar) in its beak. And – oh yes – in the stream of light generated by my flashlight, I saw a mouse crossing the track when getting up to Las Torres base.
That’s it… And nothing of this on camera… damn!
Weather
Very difficult to foresee. Based upon the stories we’ve heard and what we’ve experienced ourselves, nearly everything is possible.
We were very fortunate. Only on the first day we started fully clouded with rain and some 30km per hour winds, but as from the second day the sun was shining and it even got hot (all’s relative right – we’re talking max 9°C, but it feels a lot warmer).
So, bottom line: make sure to be equipped for every situation. Raincoat trousers (water- and windproof) are a must. But same goes for a lighter long-sleeve shirt or T-shirt.
Tips
I wanted to share the lessons that we’ve learnt during this trip with you. Some of these are rather basic, I guess, certainly if you’re an experienced multi-day hiker:
· Seems obvious, but we’ve heard otherwise: book your reservations upfront and take a copy of the reservation confirmation with you. We’ve seen occasions where they disputed the booking, which you certainly want to avoid
· Start the W trek from Paine Grande in order to get to Las Torres base on your last day – make sure to end this adventure with a blast
· Make an extra effort to get up early on that last day, to see the spectacle of the reddish sun slowly embracing the mountain tops of Las Torres
· Bring a travel towel with you – they don’t (always) have one available at the accommodations
· Don’t forget a pillow if you overnight in a tent – that’s the only thing they don’t provide
· You can charge your electronics in your room in the lodge or in the shared areas at the camp site. In the latter case it’s of course on a first come, first serve basis and you’re not the only one who needs charging. So, if you can, take precautions and take along an extra charged battery bank or solar charger
· When it comes to clothing: layers, layers, layers! We thought it would be as cold as before we started the hike, but it turned out quite on the contrary
· When booking your bus trip back to Puerto Natales, count sufficient extra time. We were lucky to be back sooner than expected, but you don’t want to rush your hiking and sightseeing
· All materials at Chileno are brought by horses, so there’s quite a few of them passing you on your way up or down. Make sure to stick to the pathways to be used for hikers and if the track is joined, make sure to give way
· Bring ear plugs if you’re a light sleeper and you’re in a shared bedroom
· There’re games available at some of the accommodations, but not at all of them. So do bring something with you to read or play in the evening
· But also, make sure to talk to the other travelers – there’s so much you can learn from them and it’s just fun to exchange stories as well as get ideas for some future travel destinations
· Order the full package including breakfast, lunch and dinner: it’s not only easy, it’s also delicious!
· All garbage needs to go back down with you, so an extra plastic bag for your trash is handy
· Leave your bags at any ranger station or accommodation, where you can. Why making it harder than need to?
· Get your drinking water topped up at one of the water streams during the hike or at one of the water dispensers at the lodges or camping sites
· These aren’t easy hikes – make sure to get some training upfront, to make sure you make it as comfortably as you can
· Get enough cash for all the activities to avoid any unpleasant surprises. In principle you can pay with card in most places, but not everywhere. To pay the shuttle bus for example, you need cash (and believe me, you don’t want to hike for another unexpected 7km extra)
· And last but not least: pray to whatever God you believe in, hoping to get the best weather you can get. We were extremely lucky, but we heard that 1 week earlier, roads were actually closed and people had to go back because of all of the rain…
Other Countries we visited
Have a look at the other countries we ‘achievied’ to visit, and other Achievies…


